
Share a Diet
Coke with Mom
Share a Coke
with a Grillmaster
Share a Diet
Coke with your BFF
Share a Coke
with your SoulmateShare a Diet Coke with Sara! *wink*wink*

This has to
be one of the best promotional stunts that Coke has ever done. When they have the “Share” labels out, I’m
hitting the stores and gas stations just to see who I should “share” a Diet
Coke with. Ha! Yeah right… like I could ever share my Diet Coke.
Anyways, my
husband came across a Coke can that said, “Sis,” so of course he took a picture
and sent it to his sister. What did she
say? “Save it.” So this can sat on top
of or fridge for months, constantly getting knocked down, getting in the
way. Finally, I had had enough. It HAD to go!
However, he
was keeping it for a reason, so I went online to see what can be done with pop
cans, and I found this. It was clever,
and a definite must do!
 |
| Pop Can Key Chain |
What you
need:
Pop cansTemplates
Scissors
Hole Punch
4mm Eyelets
Eyelet Tool
Glue
Mod Podge Dimensional Magic
6mm Jump Rings
Chain
Key ring
Ok, pick out
your cans. The Sis can was a coke, but my
sister-in-law is all about Diet Coke, so I had both.

Then you
need to dissemble them. You’ll probably
need more than one, so make sure you have enough. Cut off the top, then down
the crease, and then cut the bottom off.
Be sure to save those pop tops for future crafting projects!!

**The way took apart the cans was so unsafe. I punched a hole
in it with a paring knife then took scissors to the hole. Since then, I’ve seen how other people take
hand held can openers to the top. It
looks a lot less dangerous.**
Make
templates to use that are the size and shape you want your pieces to be. I made mine out of paper.
Hold them up
to the cans where you think the best designs are, then cut out your shapes.

Now, because
I’m making the pieces double sided, I had to cut two shapes the exact same
size. I took a shape I had just cut out and
held it up to the inside of the can, and used it to cut another piece the exact
same size.
**By holding
it on the inside of the can, you make sure to get an exact replica with both
designs facing outward.**

This is
where I added my own little twist. I decided
to put 4mm eyelets through the two pieces. I think it’s more secure for the jump
ring hole, and it gives it a more finished look. Placing cardboard underneath where I worked,
I got started. The first piece dented a
little around the hole when I tried to punch it through with a nail, but when I
used a paper hole punch, the cut was much cleaner. The eyelet slipped right through the hole,
and I used an eyelet tool to finish it off.


Now, it’s
time to glue the corresponding pieces together.
I used my trusty E6000 “kidney disease” glue to stick them together, placed
each piece sporadically inside my hard copy of Webster’s Dictionary, and set a
heavy object on top of it. Then wait overnight.

Now, gluing
them could get a little messy, (like it did with me). Don’t worry.
A little rubbing alcohol takes it right off.

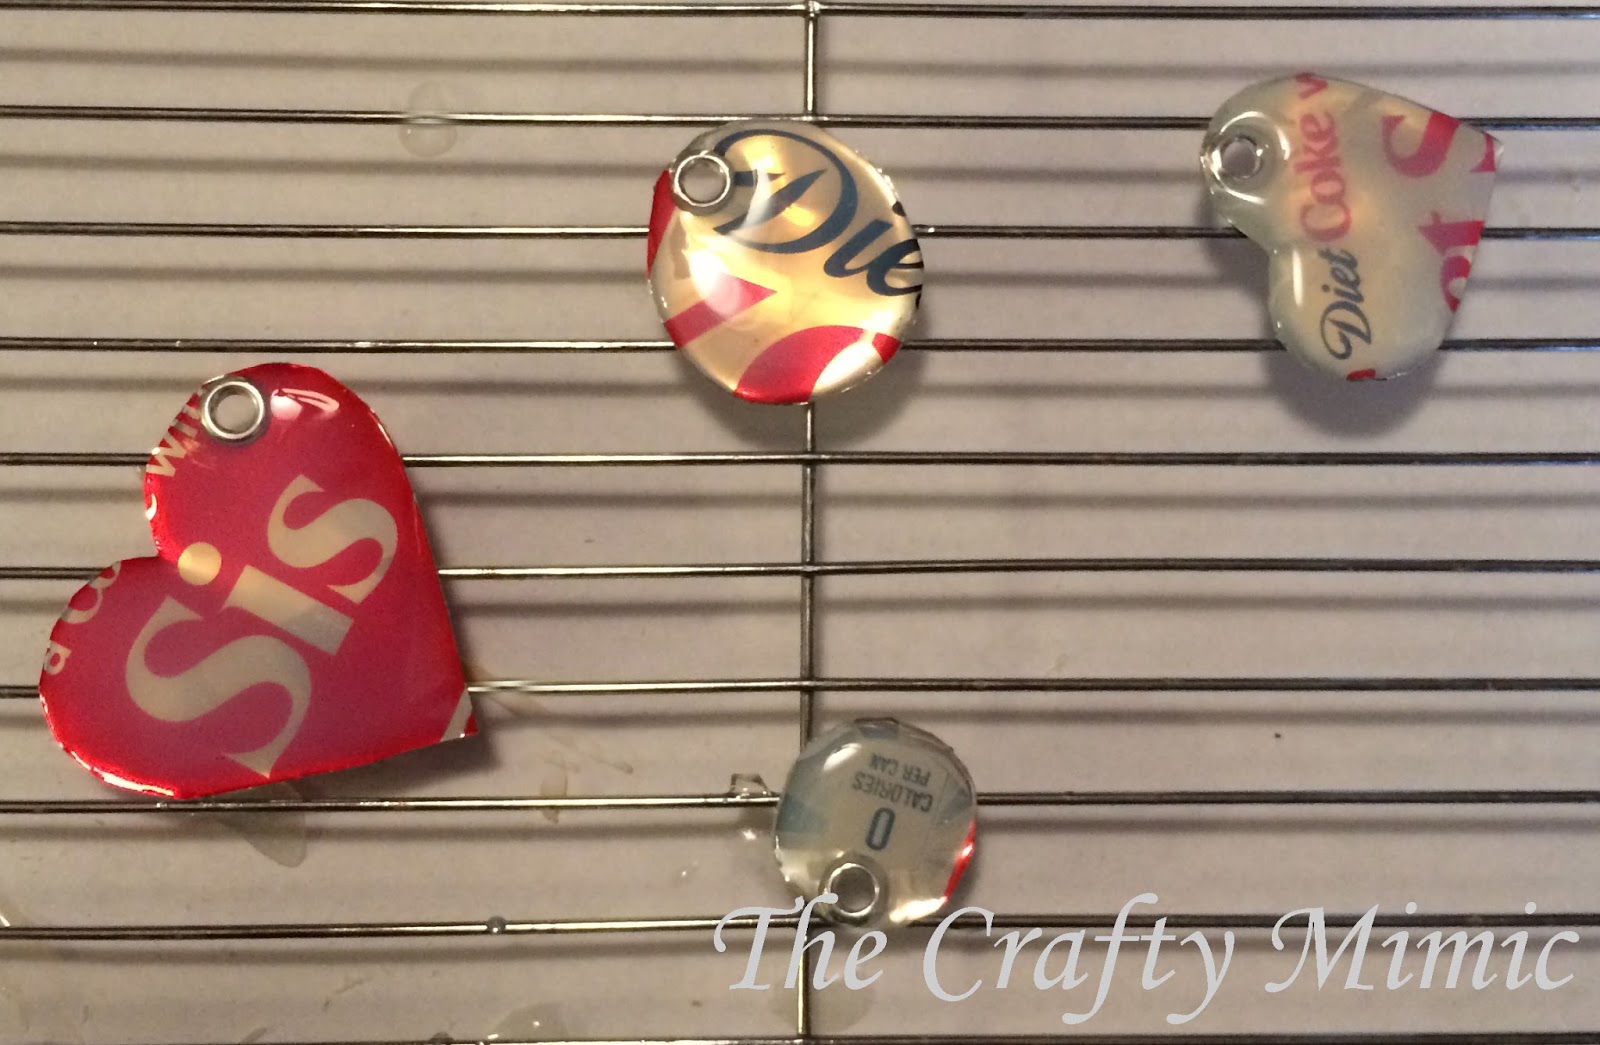
Now, for the
Mod Podge Dimensional Magic.
 I used a
cooling rack, like the tutorial recommended.
That way, the eyelets could sit in between the spaces and your pieces
could lay flat.
I used a
cooling rack, like the tutorial recommended.
That way, the eyelets could sit in between the spaces and your pieces
could lay flat.


Happy DIY-ing!!
Start to
cover your piece with the Mod Podge.
Be sure to have a toothpick handy to pop or move out any bubbles that
form.
Now, you
have to wait. Patience is key!!
It says to
wait 3 hours for it to dry. This is where I had my most problems. I am NOT a patient person. I try to be, but it doesn’t always work out.
Here’s how
my experience went…
I did the first coat, then after 30 mins, I lightly
touched one to see if I could put on another coat. Yeah, it messed up the layer, and I had to
take it off that piece and start over again.
Then after roughly an hour and a half later,
I put on another coat.
It was well into the second coat when my 4
year old daughter got curious and stuck her finger into the big “Sis”
heart.

Luckily, with some water, scraping,
and rubbing, it all came off, and I could start ALL OVER AGAIN with that one.
Finally, after all the pieces had three
coats and were dry, I tried to pick them up and found out that some Modge Podge
had seeped around to the opposite side and stuck them to the cooling rack. Once off, I had to carefully pick and peel
away all the stuff that had dried onto the other side. Apparently when doing so, the “Sis” heart
hadn’t dried all the way, and when I messed with the back, it didn’t like the attention
and cracked right down the middle of the dimensional side. Ugh!
Therefore, I had to take it off the same way as before and when I was
starting the coats to the backs of the others, I was starting on the front of
that one ALL OVER AGAIN. It was about this time that I vowed never to do this
again.
Once I got two coats on the backs of the
others, and three coats on the front of the “Sis” heart, I let it sit overnight. The next day, I got two coats onto the back
of the heart and waited till evening to put it together.
Time to
assemble the keychain. Place jump rings
through all your eyelets.
**Tip: Move
the opening to each side rather than widening it by pulling it apart.**
Find a chain
to hook your pieces onto. I used a
silver necklace.

Lay out
where you want your pieces, and clasp them to the chain.
**On a side
note… While putting my keychain together, the chain pressed too hard against
the big heart and made tiny indentions on the surface. To fix, I added one more layer of the
dimensional magic, waited overnight, and it was as good as new when it
dried. The extra layer had filled the indentions. Just like "magic"...**

Take off any
extra links in the chain, slide an end around the key ring to attach it, and you’re
good to go.
The loops on
my chain were too small to go on the key ring, and I didn’t have any extras that
were sturdy enough. Just out of
curiosity, I clipped the necklace's lobster claw clasp around the key ring, and it worked
perfectly. I think it also gives it a
unique flare.

After all is
said and done, I think it turned out really cute. Best part… It was a great gift for my
sister-in-law, who absolutely adored it.


Honestly, I’m
not sure if I’ll ever make one again because of how tedious and time consuming it
was for me. Let’s not forget messy!
But who
knows, I say that now, but you never know what I’ll decide to do in the future.
What are
some of your favorite things to do with pop cans?
Any other
ideas I should try?
Like always,
let me if you do this, what you think, and if you have any tips to “share” with
all of us.
Until then…
This type of message always inspiring and I prefer to read quality content, so happy to find good place to many here in the post, the writing is just great, thanks for the post. https://foodkeychains.com/
ReplyDelete