Showing posts with label Family. Show all posts

Tuesday, October 4, 2016

Organizing Life with Binders


Another school year has begun, and it’s as if the dust has just started to settle from a 3 month long tornado. The inside of all my cabinets felt the wrath… Even I slacked off on trying to keep things organized. 

Teachers have students bring binders to school to stay organized.  Why not take a play from their book and try it out at home?

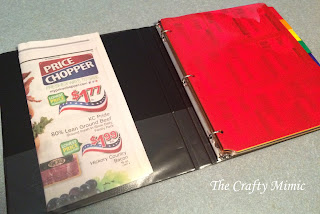
So far, I have used binders for two things that had otherwise became clutter in my home, and it has already made life so much easier.


First off... My Sports Binder

Anybody that has been paying attention, has noticed that a big part of our lives revolve around our children’s athletics.

Over the years, my kids have been in numerous sports, and every time we purchased the pictures they offered. 


It’s great to look back and see how much they’ve grown.  However, there got to be so many, I was slipping them in random folders and drawers, “for the time being.”  They went from nostalgic to a nuisance.

I finally had enough!  I went to the store and bought:


A Binder
Subject Dividers
Letter Sized Sheet Protectors
4x6 picture Sheet Protectors
Fun Stickers (optional)

Once I had everything, it was all about putting it together. 

I used the subject dividers to separate the kids.


I organized the seasons by date, so when you flipped through, you watched the kids get older. The letter sized protectors were for their team and individual pages.  Then the 4x6 protectors were for any single shots that we still had left over.


After all was said and done, I had a great place to put all of the kids’ sports photos that kept them safe and made it easily accessible for whomever wanted to look at them.


Coupon Binder


If you are anything like me, this is one of the hardest things to keep organized.  You cut out a coupon, stick it in a drawer or your purse/wallet, and then forget about it until it has long since expired.  Then there’s the hassle of flipping through your stack in the store isles to see exactly what you have, or shuffling through store ads to see what deals are out there.

I’d thought about making one of these in the past, but never did.  It felt a little embarrassing to me, thinking that people would judge me as if I were advertising the fact that I needed to use coupons.  That ship has sailed!!  I have long since learned the error of my ways!

Let me tell you… when you have a family of 6, and we all need food, clothes, medicine, and personal items, you need all the help you can get, including (and not limited to) coupons.  This binder has made shopping so much easier and not as stressful.


What I used:
A Binder   
Subject Dividers
Trading Card Protectors

**My subject dividers are the ones with a pocket in the front.  I found this helpful in the store to keep track of the coupons I was planning on giving to the cashier.**


I used the subject dividers to separate the types of coupons. My labels are:

Breakfast, Snacks, Meats & Cheeses, Dinners, Drinks, Laundry & Cleaning, Personal Items, and Misc.


Using the trading card protectors, I organized the coupons.  If I had two of the same one, placed them in the same pocket but made sure the one with the earliest expiration date was on top.


Finishing off the binder… At the back, I used a letter sized sheet protector, left over from the Sports Binder (mentioned above), and placed restaurant and fast food coupons inside.

 
Then making sure to switch them out every week, I slip the shopping ads in the front pouch.


I was then ready to do some shopping.


I have had so much success with this so far, there’s no telling what other things will soon be organized in binders.

Have you used binders to make your life easier in any way?

What other ways have you used to stay organized?

Comment below to let me know!

Until next time…


Happy DIY-ing!!!   

Wednesday, March 2, 2016

My Little Grinch and Daisy Head Mayzie; Dr. Seuss Day!


Happy Birthday Theodor Seuss Geisel!!
**Better known as, Dr. Seuss**

“You’re never too old, too wacky, too wild, to pick up a book and read to a child.”

Yes, it’s that time of year again.  A time to celebrate an author that has brought us so many GREAT children’s books.  Books like the classic “Cat In The Hat” or “One FISH Two FISH Red FISH Blue FISH”, and of course no one can forget “The Grinch Who Stole Christmas”!  There are so many books, with so many unforgettable rhymes and characters.

How do schools celebrate this day?  By dressing up as your favorite Dr. Seuss character and serving Green Eggs and Ham of course!

I have had so much fun with this the last two years. 

Last year my son wanted to go as the Grinch.  No matter how much I tried to talk him out of it, because the Grinch is so much harder than some of the other characters.  He was adamant though.  He had to be the Grinch. **Keep in mind, this was three days before he needed to be dressed up.** 

That was it.  The gauntlet was thrown down, and it was either go big or go home.

I first started on the outfit.  I turned a plain white t-shirt into the Grinch’s classic ugly sweater using a freezer paper stencil and acrylic paint.  Then I stuck him in kakis and put a red long sleeve t-shirt underneath the Christmas tree t-shirt.  Bam! Done.

Next, came his head.  My husband spiked his hair, and I used hair color and sprayed it green.  Then after hours of watching YouTube videos on how to paint the Grinch face, I thought I would give it a shot.  (Click here for the one that helped me the most.)  Even though I didn't have all the colors she did, I had a great time painting his face.  I never knew it could be that fun.


Overall, I thought that it came out great and he turned out to be the star of the Whoville crowd in his classroom.  It was so much fun seeing him transform from my cute little boy into a scowling green Grinch.


“Sometimes you will never know the value of a moment until it becomes a memory.”

Now, for this year…

It was my daughter’s turn. She’s young enough that it was more up to me than her on what she was going to be.  I didn’t think she would be a fan of the face paint, so I went in search of something cute but different.  That’s when I started to see all these girls with a flower growing out of their hair.  That’s when I got introduced to Daisy Head Mayzie. 

Her look was simple, just a pink dress with white ruffles.  Oh, let’s not forget the daisy coming out of her hair.

Believe it or not, my daughter did not have a pink dress anywhere.  She’s more of the jeans and boots type, so dresses are somewhat scarce around here.  I did find her pink tutu that her older brother gave her for her birthday last year.  Now all I needed was a plain pink shirt. 

I went and bought a cheap pink shirt, some white felt, wide white ribbon, a fake daisy, and a headband. 


When I got home, it was time to put it all together. 

I first sewed the white ribbon around the band of the tutu, leaving two long strips in the back to tie them into a big white bow.


Then I cut ruffles out of the white felt and sewed them around the neck and arm holes.


Paired with white tights, a small pair of pink shorts underneath the tutu, and pretty shoes, her clothes were done.


Now for the daisy.  I had no idea how I was going to get the flower to stay on the headband.  I cut the stem down and stripped it until the wire was free. 


I then tried to wrap it around, but couldn’t get the wire securely around the band so the flower wouldn’t move.  That’s when my husband stepped in, and said he would take care of it. 

I leave the room, and when I come back, he had drilled a hole in the middle of the headband, stuck the wire through, and tightly wrapped it around the headband.  That flower was not going anywhere!


It was headband against man, and man prevailed!! Thank you, Hun!

After that was finished, her outfit was done.  She did need clips around her headband so it would stay on her head, but you could barely see them amongst her hair.

“Why fit in when you were born to stand out?”


She was so cute! When we got to school, she was shy and didn’t want to go in her classroom, but once she heard that a lot of her friends had crazy hair and clothes on too, she was all for going in.  It was a great day for her.  My only wish is that she would have at least TRIED the Green Eggs and Ham!  Maybe next year…

**Helpful hint: I have to say how much better it was to sew an outfit instead of using hot glue or paints.  When my daughter was done being Daisy Head Mayzie, I just seam ripped through the outfit, and her tutu was back the way it came, and she had a new pink shirt to wear whenever she liked.**


So, I need to know… Who is your favorite Dr. Seuss character?

Do you like Green Eggs and Ham, Sam I am?

Comment below, and let me know!

Until next time…


Happy DIY-ing!!!


“Don’t cry because it’s over.  Smile because it happened.”

Monday, February 15, 2016

Valentine Box Mania


It’s February!  You know what that means, don’t you?
Valentine Parties
Valentine Favors
Then of course there’s the Valentine Boxes!!


2016
This year, three of my kids needed boxes, and it was so much fun coming up with the things that matched their personalities.

We started off with three plain boxes,


and take a look at what they turned into…


The Chocolate Bar Valentine Box

Click here for how-to instructions.


The Leonardo Ninja Turtle Valentine Box

Click here for how-to instructions.


The Pink Valentine Mailbox

Click here for how-to instructions.


Comment below and tell me what you think, and please share any creative Valentine boxes that you've come up with.  We'd all love to see them. 

Until then...

Happy Holidays & 
Happy DIY-ing!!
 

Pink Valentine Mailbox


Okay, I have to admit that I did do a little corrosion with this one.  My daughter is in preschool, and this was her first year to have a Valentine box.  She didn’t even know what she needed a box for, but she knew that she wanted it pink.  It was Mommy that saw the cute mailbox on Pinterest and showed it to her.  A little, “Oh! Wouldn’t this be so pretty!! Do you want one like this?” and it was done, Mommy was making a mailbox. 


So first thing’s first, I needed a mailbox.  I saw where Hobby Lobby had a cardboard one, but we don’t have a craft store close by, so I can only make it to one once in a blue moon.  I was just contemplating how to construct one out of cardboard, when I saw that Walmart had these cute little themed mailboxes for Valentine’s Day.  They were perfect!

I grabbed one that my daughter wouldn’t mind me painting over, because the world would stop spinning if I painted over princesses or puppies.

We went with Star Wars.  Plus, the Valentines inside were perfect for my son.  It was a win-win here!

So, here’s where I made my mistake.  I wanted to save time and spray paint the box instead of painting it all with my acrylics.  First, I spray painted it white as a primer to cover the dark design.  At the same time, I painted a glass candle holder that I found at Dollar Tree for only $1.


Then I spray painted the box pink.
 
However, it was cold and I was in a hurry, so I went too fast and put too much on.  Plus, the mailbox I bought was a finished product and the outside was shiny and slick before I started painting.  Put together that equation…  Yep, it started to run, and I was kicking myself for not hand painting it instead.


Once it was all dry, I had to do some major cover up.  Taking wadded up plastic wrap and some dark pink paint, I went around and blotted color over the entire box.


Afterward, I thought it was a little too bold, so I took a light pink and went over the top of the brighter pink in a few spots.  This helped to tone it down some.


Next, it was time to decorate.  I drew and cut out a large flower from white paper and gave it to her to color while I cut out the green leaves that it was going to lay on.  Then we glued the flower to the back of the mailbox.  I then glued on a big B to the front that was cut out of pink paper, along with white strips to give it some depth. 

Then there was the flag.  What’s a mailbox without a flag?  I cut hers out of extra cardboard and glued it to the side.

**I also thought to connect it using a brass fastener.  It would have made it so cool if she could have actually moved it up and down, but time and supplies were not on my side.**

Next, I measured and found the middle of the mailbox on the bottom, and glued the spray painted candle holder onto the spot.

Then we needed a handle to open and shut the box.  I dug through my craft box, and came out with a handful of marbles.  I used my hot glue gun and stuck the marble to the top of the door. 

The mailbox was SO cute, however my daughter wanted to put her own little flare on the box.  What better way to jazz something up then with shiny sequins? 

She picked out all the ones she wanted, told me where to put them, and I used my glue gun to attach them. 

**In hindsight, the sequins could have more than likely been glued on with Elmer’s, but I wanted to make sure they held.  The glue gun melted them some, and burned my fingers a lot.  Next time, I’ll probably use Elmer’s.**


There, everything was done.  With this mailbox, I think the box was too big for such a small candle holder, and so the proportions were somewhat off.  However, she was happy, and that’s all that matters.  It was big enough that her Valentines could fit into, but small enough to where she had no problem holding it.


Overall, I think it was a wonderful first Valentines box for her.  With her, you never know what next year will bring, but I can bet money it will be pink.
Until next time…


Happy DIY-ing!!

Leonardo Ninja Turtle Valentine Box


My younger son is addicted to Ninja Turtles!  I used to love them as well, my favorite being Michelangelo, same with my husband. My son, being the goofball he is, I was surprised that his favorite wasn’t the same.  No way!  He likes the man in charge, or should I say “turtle”, Leonardo.  So I got started on his Valentine box.


For this box, the obvious step was to spray paint the box green.  Yes, you can use paper to cover the box, but I didn’t want the hassle of trying not to mess the paper up while gluing onto and cutting into the box.


Then, I cut a small hole into the top of the box to slip the Valentines in, then I cut a larger hole in the back, so he could get them out. 

Next, I used construction paper and cut out the mask.  Once I glued white paper to the back of the eye holes, I then glued it onto the box.  Then, I cut two more strips of equal width and glued them around the box to make it look like a continuous strip around his head. 

Now, because my son has brown eyes, it was obvious what color I had to make Leonardo’s.  I drew the eyes on with pencil, then colored them with markers.

**Helpful hint:  Before doing ANYTHING permanent such as using markers or paint, draw it out with pencil first!  Pencil can always be erased it you don’t like the look.**

Then it was time for the mouth.  I could have easily drawn a smile, but that’s Michelangelo.  Leonardo is so serious and tough.  Of course he had to have the scowl.  I drew it on a piece of paper, before cutting it out and gluing it to the box. 

Next, I grabbed some extra cardboard and cut out the shapes for the front of the shell, back of the shell, and the swords. 

Now, I needed to make the back shell hinged so it could cover up the large hole, but still come down when he needed to get out the Valentines.  Since cardboard is made up of layers, I scored the cardboard, but didn’t cut all the way through.  That way, it made it bendable. 


Time to break out my paints.

I painted the front shell, and made sure to shade in the ridges.  Then I painted the back shell and both sides of the two swords. 

Once everything was completely dry, I glued the front shell to the box.  Then, I glued just the bottom of the back shell to the box, so it could open and shut.  Then, I judged the height I wanted the swords showing in the front and glued them on top of the back shell.

Now for the cool part.  I used two sets of Velcro pieces and hot glued them to the box and the shell on each side so it would hold shut until he wanted it open.


**The picture shows a blemish in the middle because I started with one in the middle, but the hot glue wouldn’t stick to the tape on the box, so I had to take it off.**

Let’s not forget the brown straps that run across his back, front, and over his shoulder.  I just cut those out of cardstock paper and glued them on. 

Everything looked great, and my son was ecstatic to show off his box at school!


He’s already planning next years.  Right now it’s Spiderman, and I have SO many cool things popping up in my head on what I can do with that one.

Guess we’ll just have to wait and see…

Until then…

Happy DIY-ing!!