Saturday, September 24, 2016

Art Paper Box


In my house, art is a popular thing amongst my kids.  I always encourage them to have fun and create all the little things they can imagine.  We even have a special cabinet in our kitchen that’s designated for this.  That’s where we keep their chalk, magic sand, sensory balls, stickers, glue, markers, and more. 

What made no sense was that all their construction paper was stored in a cabinet in our hallway, to where they had to climb on a chair to get it.  I’m not exactly sure why it was there, but I knew that I needed to get the sheets to their cabinet. However, it had to be a way that kept the paper together, was easy for them to get to, and made it so paper wouldn’t become destroyed and thrown all over the inside of the cabinet.  (My kids can be little tornados sometimes.)

With this in mind, I came up with an idea, and I started to eye a box of Lucky Charms.
 

After everything, I now have a paper box that works great, and I couldn’t be happier.  Here’s how to make an easy, convenient, and non-obtrusive art paper box. 

What you need:
Empty cereal box
Pen / Pencil
Scissors / X-acto Knife

(Optional)
Wrapping Paper
Tape
Command Strips

First, find a cereal box that will fit the size of paper you want it to hold.


If you’re putting it on the inside of a cabinet door, like me, you will also have to make sure the box fits on the door without preventing it from shutting.


Place a piece of art paper on the box so you can judge where it will need to be cut.  Mark it.


Remove the paper and finish drawing your cut line, then take your scissors or X-acto knife and cut on your drawn line.  Make sure to cut both sides of your box.


**Don’t forget to cut out save those box tops to turn in at your child’s school! It’s such an easy way for them to raise money.**


There… your paper box is done.  You can stop here, and it would work just as well as mine.


However, I decided to dress up my box a little to make it more fun looking when the cabinet is opened.  I did this by wrapping it in playful wrapping paper.


Wrap and fold the box the same way you would a birthday or Christmas present, leaving the top open.


When that’s done, fold over the edges of the box at the top.


After a decent amount of paper is folded down into the box (enough so whatever parts of the box’s inside are showing will be covered in wrapping paper), cut off the excess.


Tape down the paper on the inside of the box.  **On the bottom and back, I used normal scotch tape, since I knew it wouldn’t be seen.  However, the inside that COULD be seen, I used double sided tape to make the appearance cleaner.**


I love how the finished product looked!


Except, I still needed to hang up the box.  This is where I broke into my supply of extra Command strips.  Yes, I keep everything!


I strategically placed the strips on the corners to best hold the weight of the paper, and stuck the box onto the inside of our art cabinet door.  Press and hold each strip for 30 seconds, and don’t load the box with paper for at least an hour.


**Side note: At first I put on Velcro Command strips, thinking that it would be great if I needed to take the box off for any reason.  However, they didn’t stick too well and made the box stick out more than normal. They easily came off, and I put on the sticky clear, and flat ones.  I’ve had no problems since then.  Trial and error, people! Trial and error!**

Now, our box is loaded with colored and white paper so the kids can easily get what they need.


It’s great watching them grab their paper and head off to create new projects. No more climbing on chairs or kids messing around in our adult office supplies.  It’s easy to make, convenient for the kids, and brings to mind so many more ideas I can make out of snack and cereal boxes.

Have you made anything amazing out of cereal boxes? 

What is the best thing you have done or made to make your life just a little bit easier?

Comment below to let me know!

Until next time…

Happy DIY-ing!!!

Saturday, September 10, 2016

DIY Bug Jars


What does every little explorer need? Their very own bug jar to hold and carry their squirmy finds!!


My kids are notorious for going through loads of bug containers.  If it’s not my Mason jars that get lost or left outside, it’s the broken plastic ones that we bought from a store. (Those had no chance of surviving with my rambunctious children.)

After the gazillionth time of being asked for a container to hold a creepy crawly, I decided it was time for their very own, durable bug jars.  But what to make them out of??

Luckily, my family is full of pickle fanatics, I mean… my children even love pickle juice snow cones. **Shudder**

They had just finished off two pickle jars, and I snatched them before they were thrown away. 

The great thing about this project is that the ideas are endless!

Both my jars were 24oz, but any size can be used.


First, remove the label from the jar, and clean out the inside really well.  We don’t want to harm any of the animals because of leftover food! **Helpful Hint: Vlasic pickle jar labels come off super easy.  Water, soap, and lightly scrub off… Done!**

Now, what is a must have with every bug jar? AIR HOLES!!

Take a screwdriver and hammer, and gently tap through the lid to make small holes.


Oops, I accidently made one too big.  We don’t want any little insects escaping, especially in the house!  No problem, I just flipped the lid upside down and used the hammer to refold the metal back in place.


You can now leave the lid as is, but WE took ours outside and sprayed them different colors with metal spray paint. 


**Make sure to use a toothpick and clear out any air holes that got clogged with paint.**


It’s finally time to decorate! I knew I wanted to used everything foam, because if it gets wet it will dry just like new. Anything paper would disintegrate fast!

First, I cut out grass strips and hot glued them to the bottom of both jars.


Next, I got a ton of foam stickers, dropped them in a big pile, and told my kids to have at it!


This was their favorite part!  They could personalize it in any way they wanted, but I had to remind them that if they put too many stickers on, then they wouldn’t be able to see what was inside.  They did a great job!


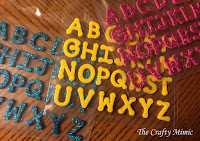
As a secret surprise, they didn’t know that I had also gotten foam letters.


When they were done, I made the finishing touches and put their names on each jar, along with a little something extra.  They LOVED it!


That’s all that it took for them to have a bug jar whenever they needed, and my little explorers were off and hunting.  They are in charge of cleaning it out and not losing it, however it does still take “Mom” to remind them to let out their finds after a day, since the “animal/insect can’t live in a jar forever.”

So far in this short amount of time, my son has caught numerous insects, a praying mantis, and a GIANT insect my husband claims was a grasshopper. My daughter, who is outside more than inside and not afraid of anything, has had insects, a snake, and even a frog.  Okay, we’re going to be honest here… It was a toad.  LOL!


These jars are so fun that even my ten year old that was “too old for bug hunting,” now wants one. Score 1 for Mom!!

What other things have you made bug containers out of?  Or better yet…

What is the strangest/coolest thing that you or someone you know has caught?

Comment below to let me know!

Until next time…

Happy DIY-ing!!!

Tuesday, August 2, 2016

Lemon-Berry Sugar Scrub


It summertime! It’s time for swimsuits, sunshine, smooth skin, and zesty smells to liven things up.  I have something that helps with two of those, and gets you in the mood for the rest.


This ALL-NATURAL scrub exfoliates the skin, making it nice and smooth while bringing in the fresh smell of summer.  After using this, you’ll want to put on that bathing suit, make your favorite tropical drink, and lay out to soak up some sun.

What you need:
3 cups granulated sugar
¾ cups dried strawberries and blueberries; before grinding
½ cup Almond Oil
2 tsp. Strawberry Extract
Zest from a small lemon
Juice of ½ a lemon
Sifter, bowl, & spoon
Storage jar


**I couldn’t find specifically dried strawberries and I wanted something quick so I didn’t dry them out myself.  Instead, I found a package of dried mixed fruit and picked out the strawberries and blueberries.**

Pour your granulated sugar into a bowl.

Blend or grind the dried fruit.  **I used a coffee grinder.**

Sift the dried fruit powder onto the sugar in the bowl.  This helps to remove the larger pieces that could hurt the skin.


Mix together.


**I ran the sugar and fruit mixture through the sifter a couple times together to make sure all the larger piece were removed.**


Stir in the almond oil and the strawberry extract.

When everything is well mixed, zest a lemon over the top.


Cut the lemon in half and squeeze the juice from one half onto the sugar scrub. Mix well.


This fills four 8oz wide mouth Mason jars to keep as spares, or to give as little gifts.


I printed off a cute label, tied it with my hemp twine that I love so much, and handed it off.  One jar went to my mom, another went to a woman I look at as a second mom, and the third went to her daughter; my best friend.  The fourth… well, the fourth went to me, of course.


This was a great little addition to our kitchen sink area.  Whenever my hands felt chapped or I wanted to feel slightly pampered, it was right there within arm’s reach.    

**It lasted me quite a while, but to keep it fresher longer, store in the refrigerator.**


What scent is most appealing to you?

What other scrubs have you made before?

Comment below to let me know!

Until next time…

Happy DIY-ing!!!

Saturday, July 16, 2016

"I Love You Because" Changeable Picture Frame


Recently, my husband and I celebrated our 12th wedding anniversary.  I mean, wow! It’s amazing how fast time flies by after you get married, have kids, and live your life connected with a person that becomes your other half.  It seems just like last week, I had a crush on this guy and thought it was funny to shove his face in his birthday cake, or when I got flowers from that guy the very first time, or when his 2 year old son snuggled with me the first time, and even when he first said he loved me.  We said “I do” and life took off. 

Now, 12 years later we are the playful and loving parents to 4 kids.  They push our buttons, but at the same time bring an unspeakable amount of love to our lives. Life isn’t always sunshine and roses, but we conquer all obstacle together.

However, sometimes we get lost in the crazy shuffle called life, and miss out on those slight touches or quick kisses to let each other know that we haven’t forgotten how it all started.  That’s why I know my husband got the perfect anniversary gift from me this year!


This frame says, “I love you because: __________.”  With a dry-erase marker, you are able to tell someone exacting why you love them that day, hour, or minute.  The best thing… it can be changed whenever you feel the need. 

This is very simple to make, and it took no time at all.

Here’s what you need:
Picture frame (mine was a 5x7)
Light colored paper
Printer
Small trinket
Hot glue gun w/ glue
Dry-Erase marker  
Frame hangers

Grab your picture frame and colored paper.  My paper had a design, but white paper would work just fine.  **I used scrapbook paper with a muted script design.  It talked about memories, so it worked perfect for this particular project.**


Find a font that you like and type “I love you because:” on the computer, with a line underneath.  With your document zoom at 100%, hold the glass from your frame up to the computer screen.  That way you can be sure it will fit and have an appealing position.  Size accordingly.

Print directly onto your background paper, and cut to fit your picture frame.


**I was thinking about painting the words onto the glass, but chose the printer version instead.  This way, the paper can be changed at a later date to say something different.**

Now, the frame could be done at this point.  However, the dry erase marker kept rolling off the top of the frame.  I needed a "marker-stopper." ß Yep! That’s technical talk right there! LOL 

This can be just about anything.  I went digging in my things and found a trinket with the word “Journey” on it.  This tied into the script for the background, and it also helped that our first dance at our wedding was to a song sung by Journey.  Just saying… That’s a win-win in my book!

Take your hot glue gun and glue the trinket to the top of the frame.  That way when the marker rolls, it’s blocked from falling off.


Use your frame hangers and place it on a wall somewhere accessible.  Make sure it’s secure so it doesn’t keep falling off when you write and erase.  **I used the Velcro Command Strips.  They will not allow your frame to move, AND they don’t put a hole in the wall.**


Next, use the dry erase marker to write what you love about the person you’re giving it to.  It can be sweet.  It can be funny.  It can be anything you feel like saying to them. 


Then easily erase it and do it again, and again, and again!


This was given as a gift to my husband.  However, he has started to use it as well.  Once in a while, it will talk about my smile or how great of a “Mommy” I am.  I always get an overwhelming sense of love when I see this because I know that he was thinking of me when he was getting ready for work, taking a break from what he was doing, or right before he went to bed.

After years of marriage, kids’ activities, and busy lives, sometimes we forget to acknowledge the ones we love, or stop to appreciate them.  This is a great gift to break through that and bring back the love that sometimes slips through the cracks. 


In addition to the frame, I needed something fun.  That’s why he also got a lucky bouquet of scratch-offs.  This was so easy! Fill a vase with the person’s favorite candy, tape the scratch-offs to skewers, and arrange them in the vase with some decorative flowers.  If you want to add a personal touch, stick in a little note that’s also taped to a skewer.  Bam, done!


He had so much fun with this, but I must say, the bouquet he got was nowhere near as beautiful as the one I got from him.


If you make either gift, let me know how it turns out, and most definitely what the person thought of it!

How many different ways can you tell someone you love them?

What other things would you make the frame say besides, “I love you because:”?

Comment below to let me know.

Until next time…

Happy DIY-ing!!!