What does every little explorer need?
Their very own bug jar to hold and carry their squirmy finds!!
My kids are notorious for going
through loads of bug containers. If it’s
not my Mason jars that get lost or left outside, it’s the broken plastic ones that we
bought from a store. (Those had no chance of surviving with my rambunctious
children.)
After the gazillionth time of being
asked for a container to hold a creepy crawly, I decided it was time for their
very own, durable bug jars. But what to
make them out of??
Luckily, my family is full of pickle
fanatics, I mean… my children even love pickle juice snow cones. **Shudder**
They had just finished off two pickle
jars, and I snatched them before they were thrown away.
The great thing about this project is
that the ideas are endless!
Both my jars were 24oz, but any size
can be used.
First, remove the label from the jar,
and clean out the inside really well. We
don’t want to harm any of the animals because of leftover food! **Helpful Hint:
Vlasic pickle jar labels come off super easy.
Water, soap, and lightly scrub off… Done!**
Now, what is a must have with every
bug jar? AIR HOLES!!
Take a screwdriver and hammer, and
gently tap through the lid to make small holes.
Oops, I accidently made one too
big. We don’t want any little insects
escaping, especially in the house! No
problem, I just flipped the lid upside down and used the hammer to refold the
metal back in place.
You can now leave the lid as is, but WE
took ours outside and sprayed them different colors with metal spray
paint.
**Make sure to use a toothpick and
clear out any air holes that got clogged with paint.**
It’s finally time to decorate! I knew
I wanted to used everything foam, because if it gets wet it will dry just like
new. Anything paper would disintegrate fast!
First, I cut out grass strips and hot
glued them to the bottom of both jars.
Next, I got a ton of foam stickers,
dropped them in a big pile, and told my kids to have at it!
This was their favorite part! They could personalize it in any way they
wanted, but I had to remind them that if they put too many stickers on, then
they wouldn’t be able to see what was inside.
They did a great job!
As a secret surprise, they didn’t
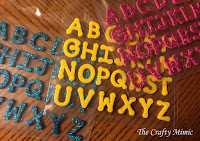
know that I had also gotten foam letters.
When they were done, I made the finishing
touches and put their names on each jar, along with a little something
extra. They LOVED it!
That’s all that it took for them to
have a bug jar whenever they needed, and my little explorers were off and
hunting. They are in charge of cleaning
it out and not losing it, however it does still take “Mom” to remind them to
let out their finds after a day, since the “animal/insect can’t live in a jar
forever.”
So far in this short amount of time,
my son has caught numerous insects, a praying mantis, and a GIANT insect my
husband claims was a grasshopper. My daughter, who is outside more than inside
and not afraid of anything, has had insects, a snake, and even a frog. Okay, we’re going to be honest here… It was a
toad. LOL!
These jars are so fun that even my
ten year old that was “too old for bug hunting,” now wants one. Score 1 for
Mom!!
What other things have you made bug
containers out of? Or better yet…
What is the strangest/coolest thing
that you or someone you know has caught?
Comment below to let me know!
Until next time…
Happy DIY-ing!!!


No comments:
Post a Comment