Showing posts with label Desserts. Show all posts

Monday, February 29, 2016

Loveable Cherry Pie Heart Pops


It’s the last day in February, and so what am I doing? I’m giving you one… last… hearts and flowers post.  Well, more hearts than flowers. 

As I was browsing Pinterest for Valentine DIYs, I saw cherry pie pops with hearts cut out of the middle. 

I thought it would be cute to go one step farther, and make the whole pie pop into a heart.  Here’s how I did mine…


Items needed:
Pie Crust
Pie Filling
Lollipop Sticks
One Egg + water
Sugar
Chocolate Chips (optional)


First, preheat your oven to 350 degrees.

Then, roll out your pie crust.  To save time, I used store bought, but there’s nothing that says you can’t make your own. 

Next, take your heart cookie cutters, and start cutting the dough.  I used a 3” heart, but left room for four 2” hearts as well.


When I had them all cut and laid out, I had enough to make five 3” pops and two 2” pops.


It’s time to spoon in the pie filling.  Not too much, or else it will seep out the sides when you place the heart on top.  Mine was mostly the liquid, but I made sure all the bigger pops had at least one cherry inside. 


When you’re done placing the filling on the hearts, make sure it’s back from the edge, close to ¼”.  This is so the two hearts will stick together without interference. 
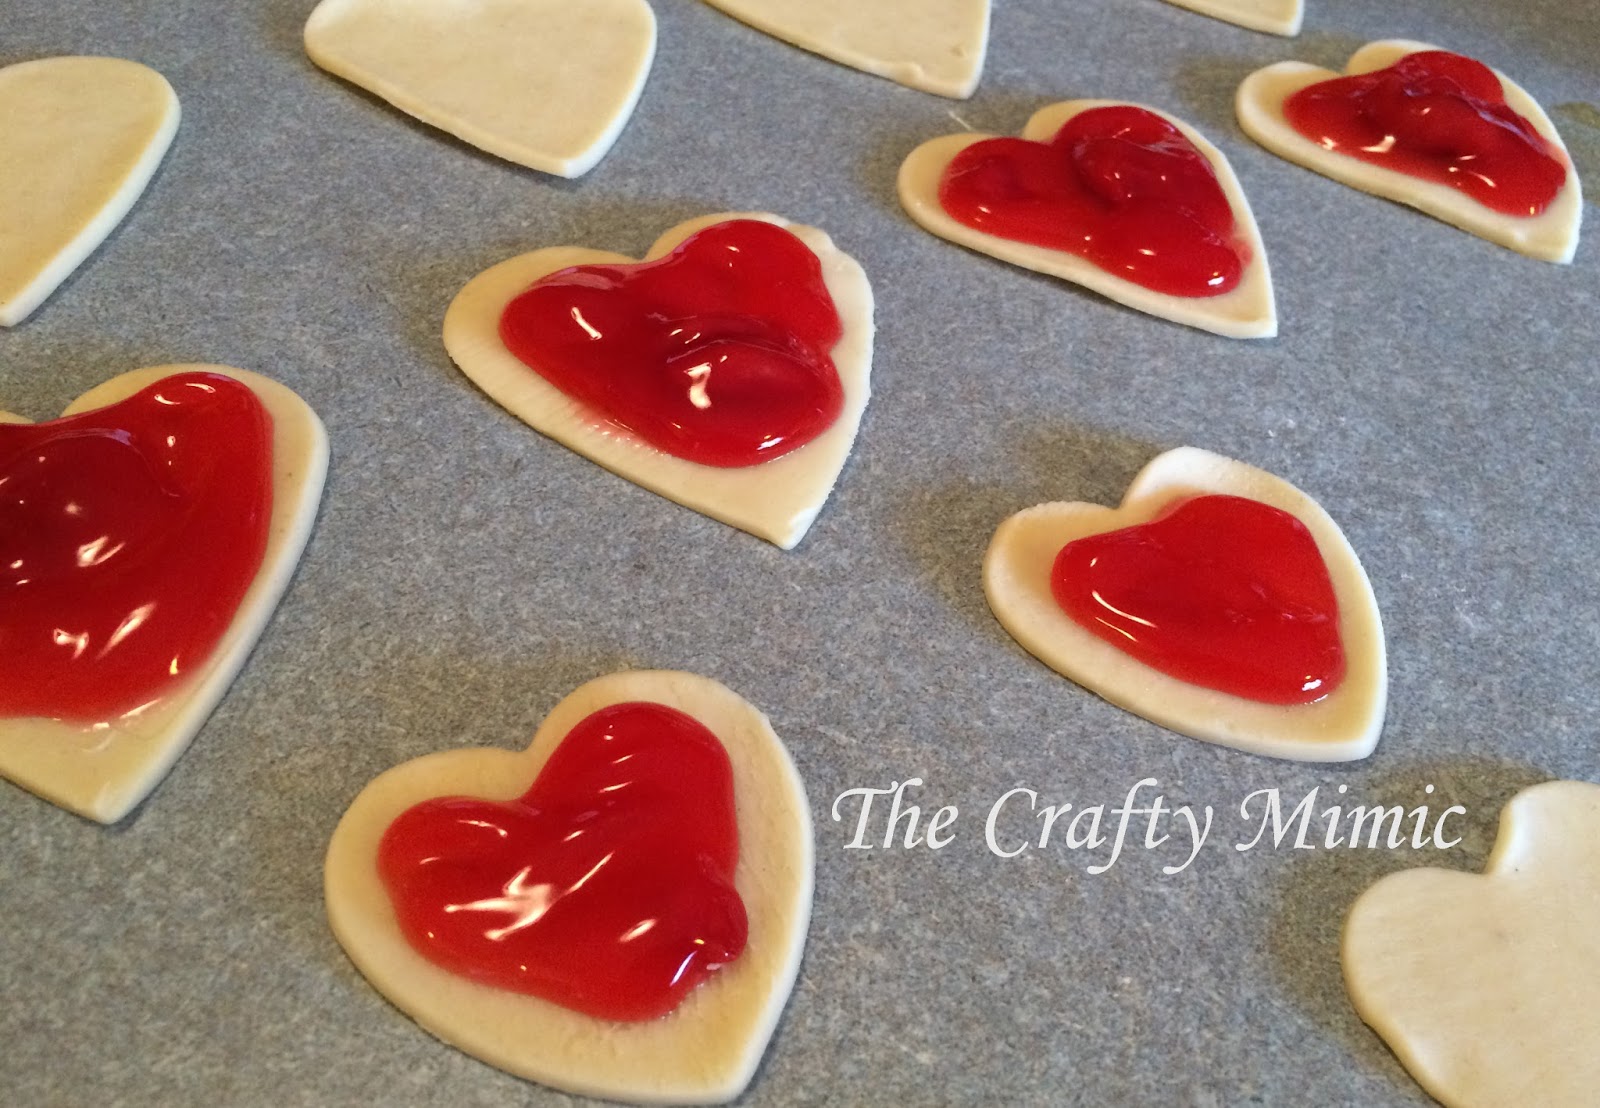


Next, place the lollipop sticks on top of the filling.  Make sure to put the end close to the top, so the cherry pie pop won’t fall off when you pick it up. 


This is when I went a little crazy.  I wanted the little pops to be something different, something to take people by surprise.  That’s when I remembered the chocolate covered cherries that we give my in-laws for Christmas every year.  To be adventurous, I put chocolate chips in with the cherry pie filling on the smaller hearts.


Next, make your egg wash; one beaten egg and a splash of water.

Then brush the edges of all hearts with the egg wash, before placing one on top of the other.
 

Some filling may come out, but that’s no big deal. Wipe it up and move along.


To press the edges of the hearts together and give them that little extra flare, take a fork and push it into the crust around the edges.


Place pops on a parchment paper covered cookie sheet to prepare them to go in the oven.

For the final touches, brush tops with egg wash and sprinkle with sugar. Then cut a small “X” on the top of each one.


Place in the oven and bake for around 20 minutes.  Every oven is different, so be sure to check on them when the time gets close.

Take them out and enjoy.

These pops were so cute, and the perfect little treat to show my family how I love them with my “whole heart”.


*******Family Verdict************

Hubby & I:  We both thought that it needed a stronger tasting filling since there wasn’t that much in them.  We also agreed that Apple Pie would be delicious in the hearts.

10 year old: He said that I hit it out of the park with the chocolate ones.

6 year old: He wouldn’t stop eating them to tell me what he thought.

4 year old:  She decided that she didn’t like the color red that day, so she wouldn’t even try them.  She doesn’t count.

********************************

What do you think of this idea of pie on a stick?

It seems like SO many foods now a days are on sticks.  What is your favorite food on a stick?

As always, comment below.  We’d love to see your opinions.

Until next time…


Happy DIY-ing!!!

Tuesday, February 2, 2016

Fruity Jell-O Whip Cream Cups; Strawberry


It’s February.  You know what that means, right?

It’s time to get cheesy.  It’s time to get mushy. It’s time to celebrate…


That’s right!  We love our family…  We love our friends… We love our hobbies…  And most importantly, we love ourselves.  This is the month to embrace all of it, and I "Whipped Up" the perfect DIY dessert to kick it off. 


My mother-in-law’s always spoiling my children, as grandparents should.  She’s constantly giving them cookies, candy, juices, ice cream, banana bread, and more.  They love it all, but there’s one thing they can’t get enough of.

She has one staple dish that my kids have aptly named, “Grandma’s Famous Jell-O.”  There’s nothing to it, just Jell-O mixed with whipped cream in a big bowl.  Throw some marshmallows on top, and voilĂ , “Grandma’s Famous Jell-O.”

For my son’s 10th birthday, I wanted to give him something different, but something I knew he would love, so I found a dessert that puts a fun and exciting twist to Grandma’s Jell-O.   (Jell-O Parfait) 

This is so easy, and it only has 3 ingredients.  To make it kid friendly, I used sugar free Jell-O, and so “Mom” could indulge, guilt free, I used Lite Cool Whip.


Being that it is Jell-O though, there was one downfall.   It took hours to complete because the Jell-O had to harden.  I’m not a very patient person, but it was worth it in the end.  

How I made it... 

(I ended up deviating from the original recipe to add more filling and not so much fruit.)  

What you need:
1 pkg strawberry Jell-O gelatin, sugar free
¾ cup diced fresh strawberries
1 ½ cup Lite Cool Whip

(I made strawberry, but I can also see this being done with other flavors as well.)

First, Mix Jell-O in a bowl, as directed on package.
 

**Tip: Use ice water to help harden the Jell-O faster, when it says to add cool water.**

Stick it in the fridge and let it cool until it starts to thicken up.  (I had to wait a little over an hour.) 

Take it out of the fridge and separate ½ cup of the Jell-O into a separate container.  Set aside.

Add the fresh fruit to the original mixture. 


Spoon it into your serving cups, and place them so they are sitting at a slant.


**The tutorial showed her using a bread pan.  When I tried this, I found that it really did work well. I have also seen this with muffin tins.  It all depends on the shape of your glass.** 

Place it the fridge to cool and harden.  (Mine took a little over 3 hours.)

Once it’s in the fridge, bring over your ½ cup Jell-O mix.  In a bowl, mix the Jell-O with the 1 ½ cup Cool Whip. 


Place the bowl in the fridge to keep cool.  Be sure to stir every so often, so the gelatin doesn’t harden. 

When the Jell-O in the serving glasses is hardened to the point where it stays diagonal when you set the glass upright, it’s time to spoon in the Cool Whip mixture. 


Once you have the desired amount in each glass, place them back in the refrigerator to stay chilled.


When you are ready to eat, put some Whipped Cream on the top and garnish with fresh strawberries. 

Now it’s time to sit back and enjoy!


My son LOVED this for his birthday, and after giving me multiple hugs, he asked me to make it again as soon as possible.  Yes!! Score 1 for Mom!!


Whether its birthdays, holidays, or “Just Because…”  This is a perfect dessert for any day, and it’s a great way to show the people you made it for, how much you care.

If you enjoyed this post, please Share it and let me know.  I always love hearing from people.

What other flavors do you think would taste good?  Who can get the most creative?

Stay tuned for more posts celebrating L.O.V.E. this February!

Until then…


Happy DIY-ing!!!