Monday, June 27, 2016

Soccer Ball Painted Mason Jar w/ Acrylics


Recently, my son’s soccer teammate had a birthday.  He knew she liked Reese’s Peanut Butter Cups, and wanted to give her some.  However, he wanted something unique to put them in. 

We have A TON of Mason jars stored away for when my husband cans pickles, and I thought it would be cool to turn one of them into a soccer ball.  That way, it stores her candy, and then she can reuse it for whatever she wants.

I have an abundance of acrylic paints, but every tutorial I found, said to use a paint specifically made for glass.  When I finally found one for acrylics, it was only a picture with no how-tos. 

I decided to try it anyways, cross my fingers and hope for the best.


What you need:

Mason Jar
Paint Brushes
Acrylic Black & White Paint
Paper Hexagon Template
Acrylic Gloss
Spray on Acrylic Sealer
Cookie Sheet & Oven
{To add personalization}
Contact Paper
Template
X-Acto Knife


First things first… Make sure your glass is clean.  I always use a little rubbing alcohol over the surface to take off debris and fingerprints.

{If personalized}

This is where you transfer your design onto the contact paper, cut it out, and place it on the glass, smoothing out all the wrinkles.  I did this the same way I do when I etch glass.  To see how, visit my page on glass etching.


Now it’s time to paint.

Paint the whole jar white. Let dry.


Use a hexagon shaped piece of paper, and hold it to the surface so you can trace around it with black paint.


**Yes! I do know that the shape on a soccer ball is a pentagon.  However, that design only works on sphere shaped objects, otherwise the edges don’t match up.  How do I know this? Yep, I tried. That jar had to be scrapped.  At that point, I could have scraped off all the paint, but I just grabbed a new jar to save time, and I started over again.**

**On another note… That’s one of the reasons I love contact paper so much.  I peeled it off one jar and placed it on the new one.  It stuck like it was brand new, with no problem.**


Once the jar is covered in hexagon shapes, fill in the black spaces and cleaned up the lines.  That’s when you have your soccer ball Mason jar. Let dry.


I then wanted the paint to really stand out, so I covered it in an acrylic gloss medium.  It gave it that little extra shine and added an enamel like coating. Let dry.


Time to seal it.  Spray on an Acrylic Sealer. Use at least two coats, following the direction on the back of the can.  Let dry at least 20 minutes before going onto the next step.


{If personalized}
Use an X-Acto knife and cut around your template.  This helps to separate it from the paint on the jar.
Slowly peel off your design.


You’re almost done...

Place the jar on a cookie sheet and slide it into an empty oven.  With the glass in the oven, preheat the oven to 350 degrees. 


**Important… If you place the glass in an already preheated oven, it could crack.  The glass has to heat slowly for safety reasons.**

Once the oven is done preheating, set a timer for 30 minutes. More time might be needed for a larger piece.

Turn off oven and let the glass cool completely inside the oven. 

**I found it helpful to do this right before bed.   That way, the jar got to cool while everyone was sleeping and wasn’t in the way of any cooking.**

Take it out of the oven and admire.  The paint is sealed, dried, and ready to go. 

All in all, it might have been easier to use glass paint.  If the acrylic paint is too thin, you can see through it, but if it’s too thick it will chip.  You have to find that happy medium.  However, this was a great example of working with what you have.

Once the jar is ready to go, fill and decorate.  Mine, of course was filled with mini peanut butter cups and tied with soccer ball ribbon. 


This project was very simple to accomplish.  It WAS time consuming, but that was only because of all the drying times. 

I would definitely do this again, maybe to make a cute little wine glass. 

Have you ever painted any glass?

If so, comment below and let me know what you used and how it turned out.

Until next time…

Happy DIY-ing!!!

Thursday, June 16, 2016

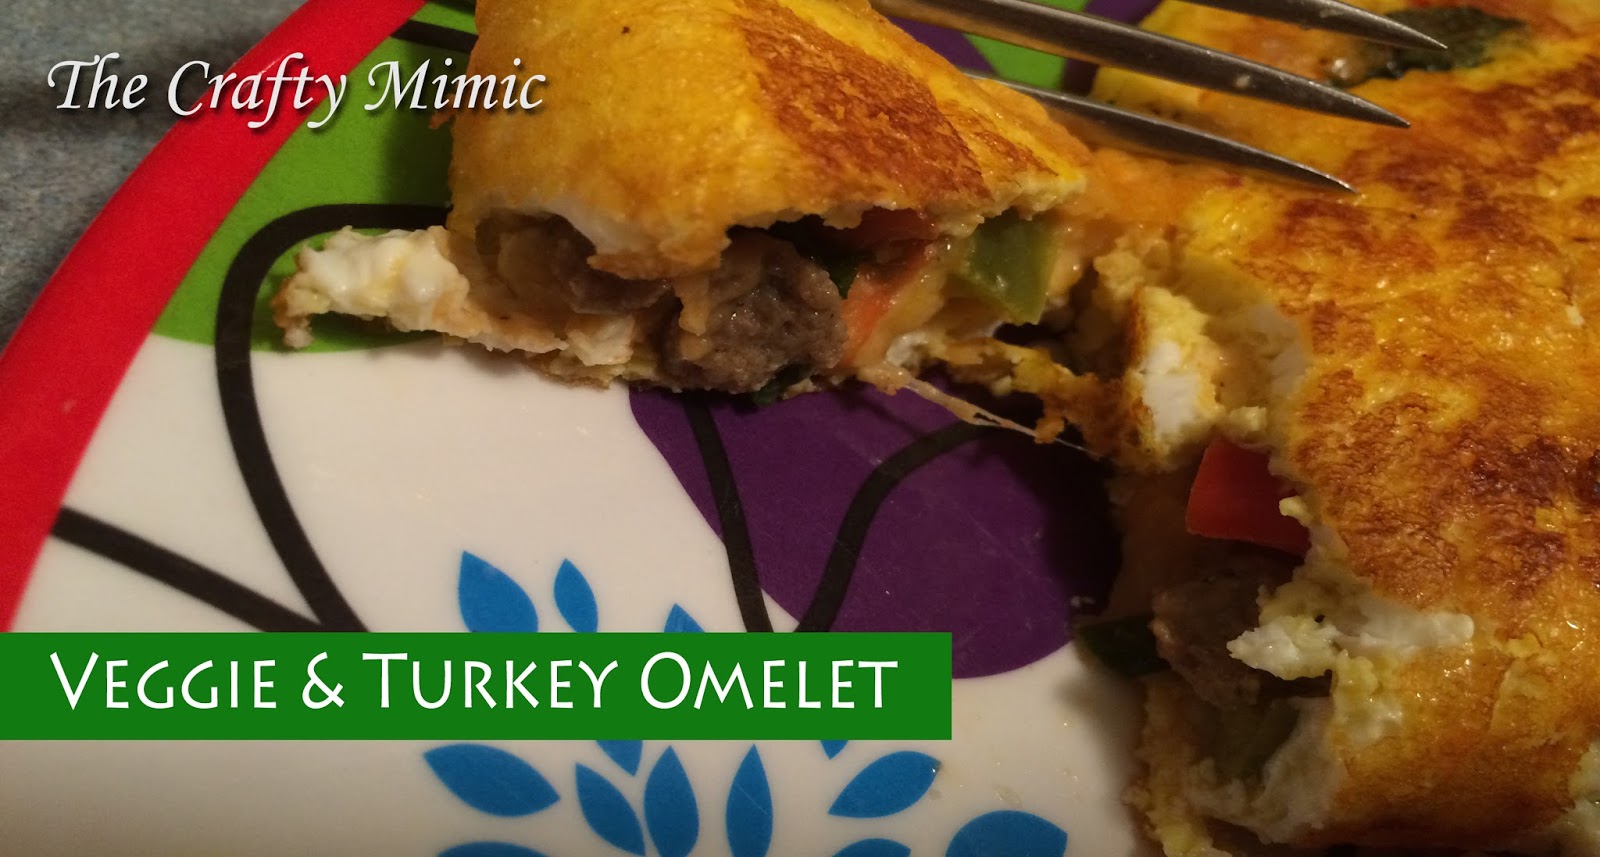
Veggie & Turkey Omelet


I pulled a Taylor Swift!!  Read on to find out what I’m talking about…

***************

One day here recently, I stopped by my parents’ house. It was a little after lunch time when my mom offered to cook me an omelet.  I said okay, and jumped onto the counter, in the same spot that I sat while growing up, and watched my mom make a delicious looking omelet that gave the room a wonderful peppery aroma.

Since then, I’ve made a few modifications, but it never fails… I think of my mom each and every time I make it, which is a lot.

Not only is it scrumptious, it also makes for a very healthy meal.  It’s so good, there’s no way I couldn’t share the recipe with you. 


What you’ll need:

Cherry Tomatoes
Turkey Sausage Crumbles (Fully-cooked)
Southwest Blend onion, red pepper, and green pepper mix
Raw Spinach (Stems removed)
Eggs (I use 3)
Tabasco Sauce
Fiesta Blend, Reduced Fat, shredded cheese
Salt & Pepper (optional)


**Amount of each ingredient is adjustable to the size of omelet you want.  Pictures below represent the portion sizes that are my usual amounts.**


First things first; spray pan with non-stick spray.  It makes everything a lot easier.

Quarter the grape tomatoes, and place in the pan.


Turn the burner on a medium heat and let the tomatoes cook until they become softer.  Push around occasionally to prevent burning. 

Add in the thawed turkey sausage crumbles and onion mix.  Cook and mix until the onions start to turn yellow.  At this time, your kitchen should be smelling delicious.


Turn the burner down to low-medium heat and add in the spinach. Mix everything together.  Keep mixing until the spinach cooks down.  This will happen quickly. 


**I usually add in a good amount of spinach; a large handful without stems.  It cooks down so much that the amount won’t compromise the omelet.**

When the spinach has cooked down, I scrape out the mixture onto a small plate and set aside.

Time for the eggs.  For my omelet I use 2 full eggs and 1 egg white.  **I know the egg whites are healthier, but I still love that yolk flavor.**

Crack the eggs into a cup or bowl.  **At this point I find it nice to use a cup that always makes me smile.**


Add in the tobacco sauce (optional), and fork the eggs together.  **Amount of sauce is determined by how hot you want your omelet.**


Pour the egg mix into the empty pan, and let cook.  Salt and pepper to taste (optional). 


When the bottom of the omelet has cooked and the edges start to thicken, add the sausage mixture on top of the egg layer.


Spread around, leaving close to a ½ inch from the edge empty.


Once the mixture is spread, sprinkle the cheese on top.


Gently scrape around and under the omelet.  Once it’s thick, but not cooked all the way through, fold it in half and gently slide it to the middle of the pan.


Leave in the pan until the eggs are cooked all the way through, flipping occasionally.


**************UPDATE***************

To prevent the possibility of the omelet sticking and breaking when you fold or flip it, spread a small amount of olive oil around the pan before pouring the beaten eggs into it.  This gives a little extra help if that non-stick spray has cooked off.
************************************

This is a great breakfast, lunch, or dinner.  I like to pair it with fruits and vegetables, but it’s not needed.  The omelet itself could be a meal because of everything that’s wrapped inside.  It’s full of protein, very filling, and has a wonderful taste. 


I have to admit that I usually have one of these every day.  It’s a good thing we have chickens.  I have an endless supply of eggs to help support my omelet addiction.


I keep getting tempted to try a fruit omelet.  That sound pretty good too.  I’ll let you know how it turns out, if I try to make one.

**************

Okay, now the thing you have all been waiting for.  How did I pull a Taylor Swift, you ask…

Awhile back, when I told you that I was going to start exercising and eating right, I put on an APPLE commercial of her falling off a treadmill.  Then I commented that I hoped it wouldn’t happen to me.

I must have jinxed myself, because low and behold… I fell off our treadmill.  Worse yet… I wasn’t wearing the stop key.  I swear, this belongs on America’s Funniest Home Videos. I was slammed against a wall, and tumbled sideways the rest of the way off. Sitting at the end, I didn’t realize that my ankle was still pressed against the turning belt until it was too late.

End result… Right shin was bruised and scraped.  Left ankle sprained and section of skin burned off.

Needless to say, I have not been back on the treadmill, but I will always have a scar to remember it by.

I have continued to exercise though.  I switched to Netfit.tv.  I would recommend this to anyone! I have lost weight, gotten stronger, and gained enough energy to keep up with my kids again. 

**Carl… if you read this, just know that every time I see you on TV, I want to punch you because you kill me for 15-25 mins at a time.  However, I want to hug you at the same time because I know how much you’ve helped me.  Thank you!**

That’s all for now.  Stay tuned for more of my drama and DIY adventures!

 Until next time…

Happy DIY-ing!!!

Monday, May 30, 2016

Broadening Family Horizons; May 2016; Cabbage Soup


As most of you know, I’ve been trying to lose a few pounds.  I was browsing one of my health food apps when I found a video for Peel-a-Pound Soup.  It looked so good, and apparently it’s magic for weight loss. There’s one problem though.

Cabbage!

Cabbage has never looked appealing to me, my kids haven’t had cabbage, and my husband has adamantly declared his hatred for the stuff.

I decided to try it anyway, and not tell anyone what was in it until after they tried it.  I know, that’s so bad. HeHe! 

Ingredients needed:

1 head of cabbage
1 large can of whole tomatoes
1 packet of Lipton onion mix
6 beef bouillon cubes
3.5 cups water
1 red onion
1 yellow onion
1 green bell pepper
1 red bell pepper
½ celery stalk
6 garlic cloves


Chop up your colorful array of vegetables.


**Yes, it’s a lot of ingredients, and it took a while to cut everything up.  Downfall!**

Find a big pot! I used our canning pot.

Dump in the tomatoes, and get a little messy by squishing them apart. **This was fun!**

Now add in everything else, but save the cabbage for last.  You might have to add in the cabbage in portions when some cooks down, depending on the size of your pot.

At this point I got a little worried.  It looked as if the soup was going to be mostly raw cabbage.

Thankfully it cooked down, and when it did it smelled great!


******************FAMILY VERDICT********************

This soup was a big hit.  All but 1 person that tried it thought it tasted good, and my son was the odd one out. Yes, the husband that proclaimed to hate cabbage even thought it was good.

I liked it, except that it left me still hungry and wanting more food.  There wasn’t enough protein in it for me. Which is okay if you have great self-control.  However, when I’m hungry, I want to shove as much food in my mouth as I can.  All I could think was that it needed some chunks of beef.  That would have made it perfect.

*****************************************************


To watch it made, here is the original video that I found. T-Roy Cooks, Peel-a-Pound Soup

His directions were so easy to follow.  However, he states that you burn more calories by eating the soup than you consume.  That’s a bit of a stretch, but one serving is low on the calorie count.


Overall, I’m glad I made this.  My family got to experience cabbage soup and it abolished some misconceptions that we all had about cabbage.

My family’s been so good about trying these healthy new things, I think I might treat them to a dessert next month.  Only time will tell.

Until next time…

Happy DIY-ing!!!

Friday, May 27, 2016

Charcoal Peel-Off Face Mask


Just recently we had a weekend that was filled with soccer games.  I LOVE to watch my kids play! I love the excitement and intensity of it all. 


However… A person’s face really takes a beating in the sun, wind, and numerous other elements.  When we got home on Sunday, after two days of games, my face felt horrendous.  It was gritty, rubbery, and just made me feel dirty. 

I remember researching peel off masks, and figured it was the perfect time to try one. 

It's time to get up-close and personal...


This mask was so simple to make, and only 4 things were needed.

2 oz. Elmers Glue (Yes, the same stuff you used in elementary school and would rub all over your hands… Ok, well I did that anyway.)
4 Activated Charcoal Capsules
A brush, and a bowl


**Why use charcoal?  I thought it was just to give it the black color, and you could better see what was pulled off.  I was so wrong!  Activated charcoal is used to draw out toxins in your body.  It can “adsorb” thousands of times its own weight of harmful substances. The toxin binds to the charcoal, and when the mask is peeled off, so are the toxins from your face. Click here for more facts about activated charcoal.**

First things first, pour your glue into the bowl.  I used a disposable bowl which made clean-up easier.

Pull apart the capsules and dump the charcoal into the glue.  This was a little harder than expected.  You would think that they would just pull apart.  No such luck! They broke, one slipped out of my fingers and landed in the glue, and it got a little messy.


Ok, a lot messy!


Use the brush and mix it all together.  You want the glue to be at a watery consistency to where it “slimes” off the brush.


Take off all makeup and prep your face.  Wet a rag with warm water and drape it over your face.  This is to open the pores and make it easier for the mask to reach everything.

Yep, that's me under there...

Time to do a little artwork! Take your brush and just start painting your face.  Be sure to avoid all hair!


I was only going to put it on my problem areas, but when I was working, I realized that my problem areas were most of my face.  So I just covered it all!

                                                                                                                                                                                                                                                                              
**Careful for drips.  It stains.**


Let it dry.  This took around 30 minutes. 


One little spot on my cheek still was a little tacky after the 30 minutes, but I have a special tool for this…


Yep, a minute using my trusty hair dryer, and the mask was completely dry.  It had a matte look to it, and my face was stuck in place.


Starting from the bottom, slowly peel it up and off your face.


I had heard many people say how painful it was.  Not to me.  It was like any other peel off mask.  That was until I got to my eyebrows.  I got too close with my mask and covered some hair.  Let’s just say that I got a facial and my eyebrows shaped, all in one swoop.

It was great though.  I’ve never had a mask come off mostly in one piece before.  It left a few pieces here and there, but nothing a wet rag couldn’t handle.


There, it was done, and I had survived the DIY Charcoal Mask.  It was time to inspect the results.

I looked down at the mask, expecting to see all these white little pieces that were pulled from my pores.  There were none!  That was a little disappointing because I know that they’re there. 

However…. And this is a big HOWEVER!

My face felt amazing! It was smooth, it no longer felt gritty or rubbery. The bottom of my cheeks did turn red.  I'm assuming it was from the peach fuzz hair that was once there.  Not a problem.  I used a good moisturizer, and within the hour it was better. 


I know it’s hard to tell the difference between the before and after pictures, but there was a definite change in the feel. 


It gave me a whole new sense of energy, and it was just what I needed after the full soccer weekend. I definitely see myself doing this again; mess or no mess…

Have you ever used activated charcoal for anything?

What is your favorite peel off mask?

Comment below to let me know!

If you enjoyed this, take a look at how I used activated charcoal to whiten my teeth!

Until next time…

Happy DIY-ing!!