Saturday, July 16, 2016

"I Love You Because" Changeable Picture Frame


Recently, my husband and I celebrated our 12th wedding anniversary.  I mean, wow! It’s amazing how fast time flies by after you get married, have kids, and live your life connected with a person that becomes your other half.  It seems just like last week, I had a crush on this guy and thought it was funny to shove his face in his birthday cake, or when I got flowers from that guy the very first time, or when his 2 year old son snuggled with me the first time, and even when he first said he loved me.  We said “I do” and life took off. 

Now, 12 years later we are the playful and loving parents to 4 kids.  They push our buttons, but at the same time bring an unspeakable amount of love to our lives. Life isn’t always sunshine and roses, but we conquer all obstacle together.

However, sometimes we get lost in the crazy shuffle called life, and miss out on those slight touches or quick kisses to let each other know that we haven’t forgotten how it all started.  That’s why I know my husband got the perfect anniversary gift from me this year!


This frame says, “I love you because: __________.”  With a dry-erase marker, you are able to tell someone exacting why you love them that day, hour, or minute.  The best thing… it can be changed whenever you feel the need. 

This is very simple to make, and it took no time at all.

Here’s what you need:
Picture frame (mine was a 5x7)
Light colored paper
Printer
Small trinket
Hot glue gun w/ glue
Dry-Erase marker  
Frame hangers

Grab your picture frame and colored paper.  My paper had a design, but white paper would work just fine.  **I used scrapbook paper with a muted script design.  It talked about memories, so it worked perfect for this particular project.**


Find a font that you like and type “I love you because:” on the computer, with a line underneath.  With your document zoom at 100%, hold the glass from your frame up to the computer screen.  That way you can be sure it will fit and have an appealing position.  Size accordingly.

Print directly onto your background paper, and cut to fit your picture frame.


**I was thinking about painting the words onto the glass, but chose the printer version instead.  This way, the paper can be changed at a later date to say something different.**

Now, the frame could be done at this point.  However, the dry erase marker kept rolling off the top of the frame.  I needed a "marker-stopper." ß Yep! That’s technical talk right there! LOL 

This can be just about anything.  I went digging in my things and found a trinket with the word “Journey” on it.  This tied into the script for the background, and it also helped that our first dance at our wedding was to a song sung by Journey.  Just saying… That’s a win-win in my book!

Take your hot glue gun and glue the trinket to the top of the frame.  That way when the marker rolls, it’s blocked from falling off.


Use your frame hangers and place it on a wall somewhere accessible.  Make sure it’s secure so it doesn’t keep falling off when you write and erase.  **I used the Velcro Command Strips.  They will not allow your frame to move, AND they don’t put a hole in the wall.**


Next, use the dry erase marker to write what you love about the person you’re giving it to.  It can be sweet.  It can be funny.  It can be anything you feel like saying to them. 


Then easily erase it and do it again, and again, and again!


This was given as a gift to my husband.  However, he has started to use it as well.  Once in a while, it will talk about my smile or how great of a “Mommy” I am.  I always get an overwhelming sense of love when I see this because I know that he was thinking of me when he was getting ready for work, taking a break from what he was doing, or right before he went to bed.

After years of marriage, kids’ activities, and busy lives, sometimes we forget to acknowledge the ones we love, or stop to appreciate them.  This is a great gift to break through that and bring back the love that sometimes slips through the cracks. 


In addition to the frame, I needed something fun.  That’s why he also got a lucky bouquet of scratch-offs.  This was so easy! Fill a vase with the person’s favorite candy, tape the scratch-offs to skewers, and arrange them in the vase with some decorative flowers.  If you want to add a personal touch, stick in a little note that’s also taped to a skewer.  Bam, done!


He had so much fun with this, but I must say, the bouquet he got was nowhere near as beautiful as the one I got from him.


If you make either gift, let me know how it turns out, and most definitely what the person thought of it!

How many different ways can you tell someone you love them?

What other things would you make the frame say besides, “I love you because:”?

Comment below to let me know.

Until next time…

Happy DIY-ing!!!

Wednesday, July 6, 2016

Greeky Fruit Salad


If you’re looking for a quick and easy side to any main dish, or a great snack to serve the family, I have just the thing for you.

I stumbled across this recipe by “lemon tree dwelling” one day, and it quickly became a family favorite.  However, “Ambrosia” was a little hard for the kiddos to remember, so they thought it was funny to rename it Greeky Fruit Salad.

It’s so easy to make! Trust me on this… If I can make this without messing up, so can you.

What you need:

1 cup Greek yogurt
½ tsp vanilla extract
2 Tbsp no calorie sweetener
2 cups green grapes
1 cup sliced strawberries
1 cup blueberries
1 (20 oz.) can of pineapple chunks (drained)
1 (15 oz.) can of mandarin oranges (drained)

**I know it seems like a lot of ingredients for something so easy, but it’s worth it.  I’ve even thought that cherries would make a great addition as well.**

In one bowl, combine all 5 fruits, and carefully mix together.  **Don’t forget to drain the cans.**


In another bowl, mix together the yogurt, vanilla, and no calorie sweetener. 

**I am a big advocate for working with what you have available, and as you can see, I only had tiny packets to sweeten a beverage.  No biggie, I used them until I hit 2 Tbsps.  FYI… that comes out to around 12 little packets.**


Once your yogurt bowl is well mixed, pour it over your fruit mixture.  Once everything is in the same bowl, gently fold everything together, making sure all fruit is coated. 

**Whenever you mix or serve this, be careful not to crush the mandarin oranges.  They are fragile and come apart easily.**


That’s it, you’re done!


Now… you can serve it right away, but I recommend chilling it for at least 30 minutes. **When the yogurt gets too warm, it get soupy.*

I’m so glad that I found this recipe.  Not only does it taste good, but its great for ALL members of the family, even the ones that are watching their calorie intake.


So don’t worry about being a little greeky! Go ahead and enjoy this great fruity treat.

Until next time…

Happy DIY-ing!!!

Monday, June 27, 2016

Soccer Ball Painted Mason Jar w/ Acrylics


Recently, my son’s soccer teammate had a birthday.  He knew she liked Reese’s Peanut Butter Cups, and wanted to give her some.  However, he wanted something unique to put them in. 

We have A TON of Mason jars stored away for when my husband cans pickles, and I thought it would be cool to turn one of them into a soccer ball.  That way, it stores her candy, and then she can reuse it for whatever she wants.

I have an abundance of acrylic paints, but every tutorial I found, said to use a paint specifically made for glass.  When I finally found one for acrylics, it was only a picture with no how-tos. 

I decided to try it anyways, cross my fingers and hope for the best.


What you need:

Mason Jar
Paint Brushes
Acrylic Black & White Paint
Paper Hexagon Template
Acrylic Gloss
Spray on Acrylic Sealer
Cookie Sheet & Oven
{To add personalization}
Contact Paper
Template
X-Acto Knife


First things first… Make sure your glass is clean.  I always use a little rubbing alcohol over the surface to take off debris and fingerprints.

{If personalized}

This is where you transfer your design onto the contact paper, cut it out, and place it on the glass, smoothing out all the wrinkles.  I did this the same way I do when I etch glass.  To see how, visit my page on glass etching.


Now it’s time to paint.

Paint the whole jar white. Let dry.


Use a hexagon shaped piece of paper, and hold it to the surface so you can trace around it with black paint.


**Yes! I do know that the shape on a soccer ball is a pentagon.  However, that design only works on sphere shaped objects, otherwise the edges don’t match up.  How do I know this? Yep, I tried. That jar had to be scrapped.  At that point, I could have scraped off all the paint, but I just grabbed a new jar to save time, and I started over again.**

**On another note… That’s one of the reasons I love contact paper so much.  I peeled it off one jar and placed it on the new one.  It stuck like it was brand new, with no problem.**


Once the jar is covered in hexagon shapes, fill in the black spaces and cleaned up the lines.  That’s when you have your soccer ball Mason jar. Let dry.


I then wanted the paint to really stand out, so I covered it in an acrylic gloss medium.  It gave it that little extra shine and added an enamel like coating. Let dry.


Time to seal it.  Spray on an Acrylic Sealer. Use at least two coats, following the direction on the back of the can.  Let dry at least 20 minutes before going onto the next step.


{If personalized}
Use an X-Acto knife and cut around your template.  This helps to separate it from the paint on the jar.
Slowly peel off your design.


You’re almost done...

Place the jar on a cookie sheet and slide it into an empty oven.  With the glass in the oven, preheat the oven to 350 degrees. 


**Important… If you place the glass in an already preheated oven, it could crack.  The glass has to heat slowly for safety reasons.**

Once the oven is done preheating, set a timer for 30 minutes. More time might be needed for a larger piece.

Turn off oven and let the glass cool completely inside the oven. 

**I found it helpful to do this right before bed.   That way, the jar got to cool while everyone was sleeping and wasn’t in the way of any cooking.**

Take it out of the oven and admire.  The paint is sealed, dried, and ready to go. 

All in all, it might have been easier to use glass paint.  If the acrylic paint is too thin, you can see through it, but if it’s too thick it will chip.  You have to find that happy medium.  However, this was a great example of working with what you have.

Once the jar is ready to go, fill and decorate.  Mine, of course was filled with mini peanut butter cups and tied with soccer ball ribbon. 


This project was very simple to accomplish.  It WAS time consuming, but that was only because of all the drying times. 

I would definitely do this again, maybe to make a cute little wine glass. 

Have you ever painted any glass?

If so, comment below and let me know what you used and how it turned out.

Until next time…

Happy DIY-ing!!!

Thursday, June 16, 2016

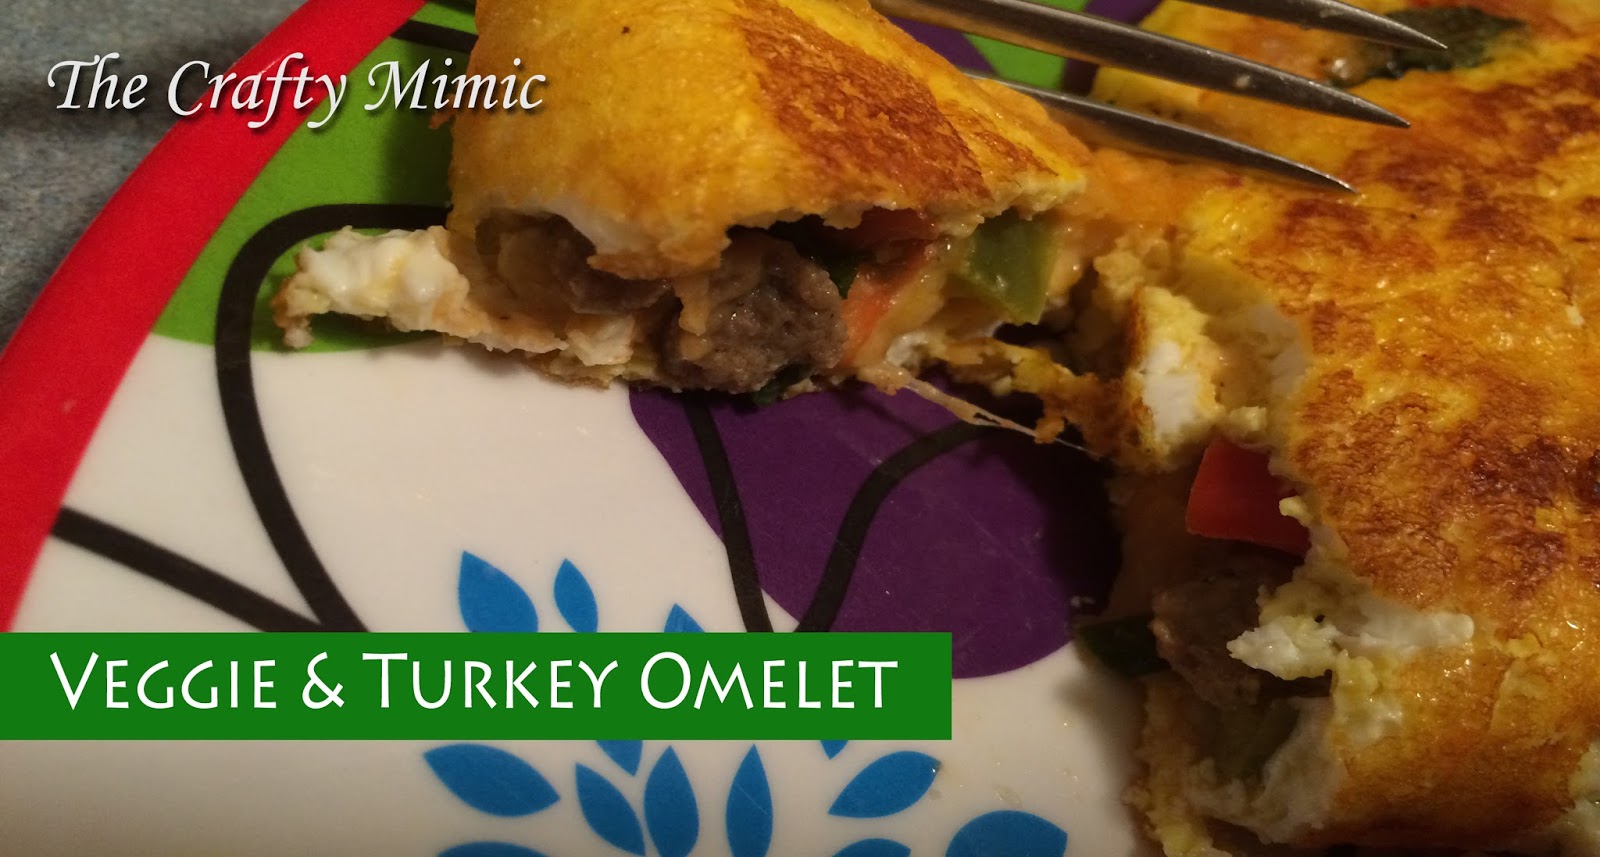
Veggie & Turkey Omelet


I pulled a Taylor Swift!!  Read on to find out what I’m talking about…

***************

One day here recently, I stopped by my parents’ house. It was a little after lunch time when my mom offered to cook me an omelet.  I said okay, and jumped onto the counter, in the same spot that I sat while growing up, and watched my mom make a delicious looking omelet that gave the room a wonderful peppery aroma.

Since then, I’ve made a few modifications, but it never fails… I think of my mom each and every time I make it, which is a lot.

Not only is it scrumptious, it also makes for a very healthy meal.  It’s so good, there’s no way I couldn’t share the recipe with you. 


What you’ll need:

Cherry Tomatoes
Turkey Sausage Crumbles (Fully-cooked)
Southwest Blend onion, red pepper, and green pepper mix
Raw Spinach (Stems removed)
Eggs (I use 3)
Tabasco Sauce
Fiesta Blend, Reduced Fat, shredded cheese
Salt & Pepper (optional)


**Amount of each ingredient is adjustable to the size of omelet you want.  Pictures below represent the portion sizes that are my usual amounts.**


First things first; spray pan with non-stick spray.  It makes everything a lot easier.

Quarter the grape tomatoes, and place in the pan.


Turn the burner on a medium heat and let the tomatoes cook until they become softer.  Push around occasionally to prevent burning. 

Add in the thawed turkey sausage crumbles and onion mix.  Cook and mix until the onions start to turn yellow.  At this time, your kitchen should be smelling delicious.


Turn the burner down to low-medium heat and add in the spinach. Mix everything together.  Keep mixing until the spinach cooks down.  This will happen quickly. 


**I usually add in a good amount of spinach; a large handful without stems.  It cooks down so much that the amount won’t compromise the omelet.**

When the spinach has cooked down, I scrape out the mixture onto a small plate and set aside.

Time for the eggs.  For my omelet I use 2 full eggs and 1 egg white.  **I know the egg whites are healthier, but I still love that yolk flavor.**

Crack the eggs into a cup or bowl.  **At this point I find it nice to use a cup that always makes me smile.**


Add in the tobacco sauce (optional), and fork the eggs together.  **Amount of sauce is determined by how hot you want your omelet.**


Pour the egg mix into the empty pan, and let cook.  Salt and pepper to taste (optional). 


When the bottom of the omelet has cooked and the edges start to thicken, add the sausage mixture on top of the egg layer.


Spread around, leaving close to a ½ inch from the edge empty.


Once the mixture is spread, sprinkle the cheese on top.


Gently scrape around and under the omelet.  Once it’s thick, but not cooked all the way through, fold it in half and gently slide it to the middle of the pan.


Leave in the pan until the eggs are cooked all the way through, flipping occasionally.


**************UPDATE***************

To prevent the possibility of the omelet sticking and breaking when you fold or flip it, spread a small amount of olive oil around the pan before pouring the beaten eggs into it.  This gives a little extra help if that non-stick spray has cooked off.
************************************

This is a great breakfast, lunch, or dinner.  I like to pair it with fruits and vegetables, but it’s not needed.  The omelet itself could be a meal because of everything that’s wrapped inside.  It’s full of protein, very filling, and has a wonderful taste. 


I have to admit that I usually have one of these every day.  It’s a good thing we have chickens.  I have an endless supply of eggs to help support my omelet addiction.


I keep getting tempted to try a fruit omelet.  That sound pretty good too.  I’ll let you know how it turns out, if I try to make one.

**************

Okay, now the thing you have all been waiting for.  How did I pull a Taylor Swift, you ask…

Awhile back, when I told you that I was going to start exercising and eating right, I put on an APPLE commercial of her falling off a treadmill.  Then I commented that I hoped it wouldn’t happen to me.

I must have jinxed myself, because low and behold… I fell off our treadmill.  Worse yet… I wasn’t wearing the stop key.  I swear, this belongs on America’s Funniest Home Videos. I was slammed against a wall, and tumbled sideways the rest of the way off. Sitting at the end, I didn’t realize that my ankle was still pressed against the turning belt until it was too late.

End result… Right shin was bruised and scraped.  Left ankle sprained and section of skin burned off.

Needless to say, I have not been back on the treadmill, but I will always have a scar to remember it by.

I have continued to exercise though.  I switched to Netfit.tv.  I would recommend this to anyone! I have lost weight, gotten stronger, and gained enough energy to keep up with my kids again. 

**Carl… if you read this, just know that every time I see you on TV, I want to punch you because you kill me for 15-25 mins at a time.  However, I want to hug you at the same time because I know how much you’ve helped me.  Thank you!**

That’s all for now.  Stay tuned for more of my drama and DIY adventures!

 Until next time…

Happy DIY-ing!!!